Choosing the Right Grow Lights
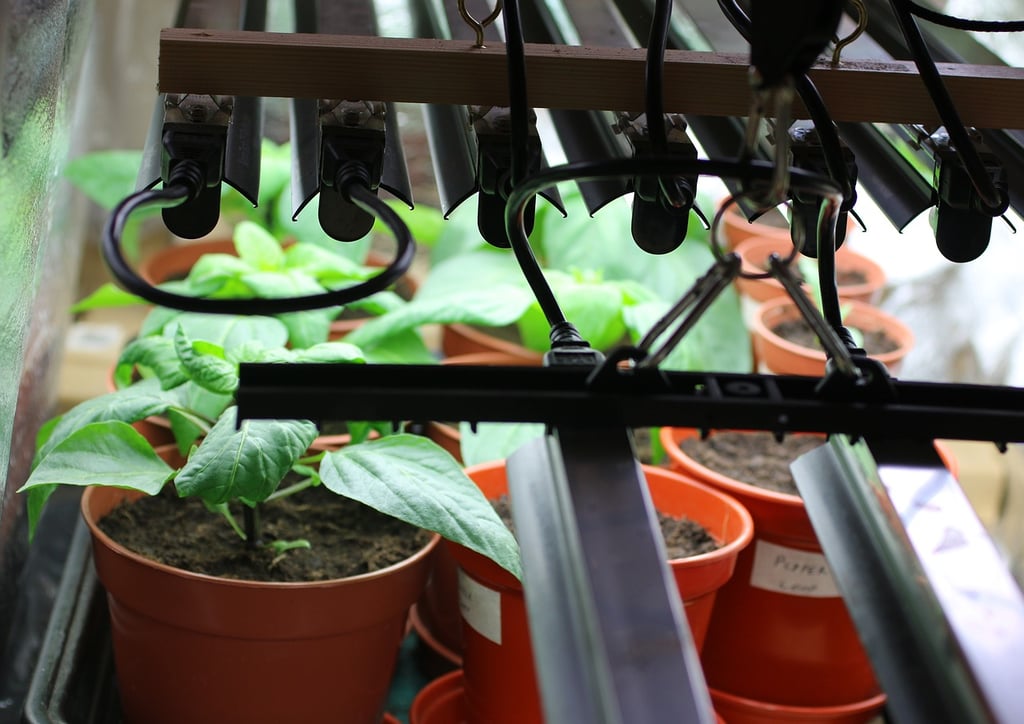
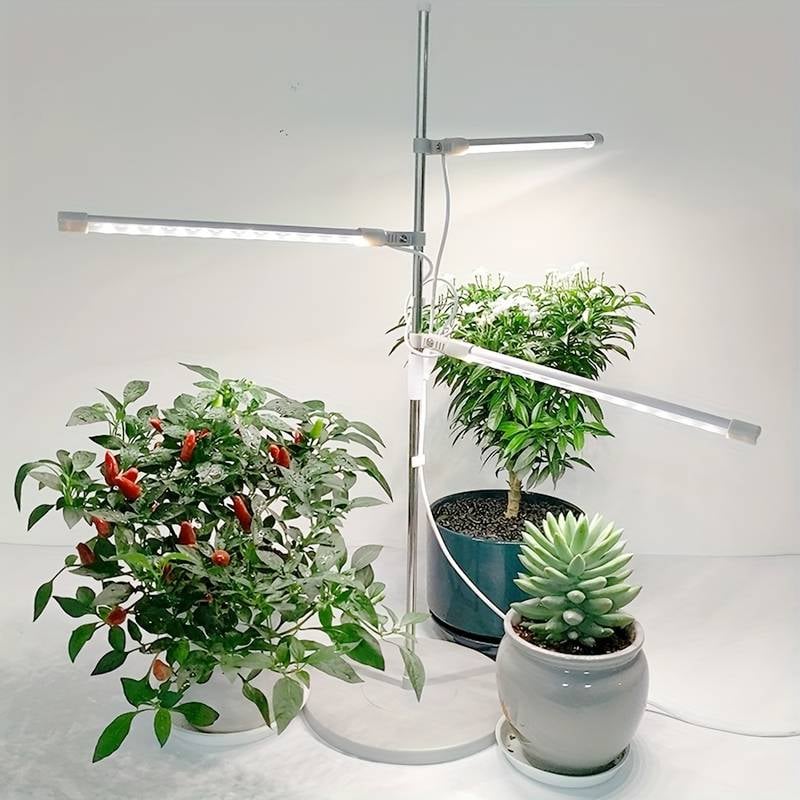
One of the most important aspects of setting up an indoor garden is choosing the right grow lights. When it comes to hanging grow lights, there are several factors to consider. First, you need to determine the type of plants you will be growing. Different plants have different light requirements, so it's crucial to select a grow light that provides the right spectrum and intensity. LED grow lights are a popular choice as they are energy-efficient and customizable. Another option is fluorescent grow lights, which are more affordable but may not provide the same intensity as LEDs. Consider your budget, space, and the specific needs of your plants before making a decision.

Calculating the Hanging Height
Once you have chosen the right grow lights, the next step is to calculate the hanging height. Hanging the lights too close to the plants can cause light burn, while hanging them too high can result in insufficient light penetration. A general rule of thumb is to hang the lights 12-18 inches above the plants. However, this distance may vary depending on the type of grow lights and the growth stage of your plants. It's essential to refer to the manufacturer's guidelines and make adjustments accordingly. Remember to regularly monitor your plants' response to the light and make any necessary changes to optimize their growth.
To calculate the hanging height for grow lights, follow these steps:
- Determine the light intensity requirements for your plants: Different plants have different light intensity needs. You can find this information in the plant's care instructions or by researching online. Light intensity is typically measured in foot-candles or lux.
- Measure the distance between the light fixture and the plant canopy: This is the distance at which you want the light to be positioned. Use a tape measure or ruler to measure the vertical distance from the light fixture to the top of your plants.
- Convert the light intensity requirement to the appropriate unit: If your light intensity requirement is given in foot-candles, divide it by 10.764 to convert it to lux. If it is given in lux, no conversion is needed
- Square the distance measured in step 2: Multiply the distance measured in step 2 by itself. This will give you the square of the distance.
- Divide the light intensity requirement by the squared distance: Divide the light intensity requirement (in lux or foot-candles) by the squared distance (in feet or meters). This will give you the required light intensity per square unit.
- Calculate the hanging height: To find the hanging height, divide the required light intensity per square unit (calculated in step 5) by the light output of your grow light fixture. The light output is typically given in lux or foot-candles per watt. This calculation will give you the hanging height in feet or meters.
For example, let's say your plant requires a light intensity of 2000 lux, the distance between the light fixture and the plant canopy is 2 feet, and your grow light fixture has a light output of 50 lux per watt. Here's how you calculate the hanging height:
- Light intensity requirement: 2000 lux.
- Distance between fixture and canopy: 2 feet.
- No conversion needed as the light intensity requirement is already given in lux.
- Square of the distance: 2 ft x 2 ft = 4 sq ft.
- Required light intensity per square unit: 2000 lux / 4 sq ft = 500 lux/sq ft.
- Light output of fixture: 50 lux/watt.
- Hanging height: 500 lux/sq ft / 50 lux/watt = 10 watts/ft².
Therefore, in this example, you would need to hang your grow lights at a height that provides 10 watts per square foot of light intensity at the plant canopy.

Installing Hanging Hooks or Racks
To hang the grow lights, you will need to install hanging hooks or racks in your indoor garden space. These hooks or racks provide a secure and stable support system for the lights. When installing the hooks, ensure they are firmly anchored to the ceiling or walls to prevent accidents. Consider the weight of your grow lights and choose hooks or racks that can withstand the load. It's also recommended to install adjustable hooks or racks, as they allow you to easily raise or lower the lights as your plants grow. This flexibility is crucial for maintaining the ideal distance between the lights and the plants.
Here is a step-by-step guide on installing hanging hooks or racks for hanging grow lights:
- Choose a suitable location: First, decide where you want to hang your grow lights. Consider factors like the height of the plants, access to electrical outlets, and availability of sufficient space for the lights to cover the desired area.
- Gather the necessary materials: You will need a stud finder, pencil, measuring tape, drill, screws, hanging hooks or racks, and a screwdriver.
- Locate the studs: Use a stud finder to locate the wooden studs in the wall or ceiling. This is important as the studs provide the necessary support for your hanging hooks or racks.
- Mark the spots: Once you have located the studs, mark the spots where you want to install the hooks or racks. Use a pencil to make light marks on the wall or ceiling.
- Measure the spacing: Measure the distance between the marked spots. Make sure the spacing is appropriate for your grow lights. Typically, a spacing of 2-3 feet between hooks or racks is recommended.
- Pre-drill holes: Use a drill to make pilot holes at the marked spots. Make sure the drill bit size matches the size of the screws you will be using.
- Install the hooks or racks: Attach the hanging hooks or racks to the pre-drilled holes using screws. Use a screwdriver to secure them tightly.
- Test the stability: Once all the hooks or racks are installed, give them a gentle tug to ensure they are properly secured. Make any necessary adjustments or tighten the screws if needed.
- Hang the grow lights: Finally, hang the grow lights on the installed hooks or racks. Make sure they are evenly spaced and at the desired height for optimal plant growth.
- 10. Connect the lights: If your grow lights require electrical connections, follow the manufacturer's instructions to safely connect them to a power source. Ensure that the electrical cords are properly secured and not posing any tripping hazards.
Remember to always prioritize safety during the installation process. If you are unsure about any step or need assistance, consult a professional or seek guidance from an experienced individual.
Attaching the Grow Lights to the Hooks
Once the hooks or racks are in place, it's time to attach the grow lights. Most grow lights come with hanging kits that include adjustable ropes or chains. These kits make it easy to hang the lights at the desired height. Begin by securing the ropes or chains to the hooks or racks. Then, carefully hang the lights onto the ropes or chains, ensuring they are evenly spaced and level. It's important to double-check the stability of the lights to avoid any accidents. If necessary, use additional clips or clamps to secure the lights in place. Properly attaching the grow lights will ensure they stay in position throughout the growth cycle.

Managing the Light Schedule
After hanging the grow lights, it's crucial to establish a proper light schedule for your plants. Different plants have different light requirements, including the duration and intensity of light exposure. Research the specific needs of your plants and set up a timer system or smart lighting system to automate the light schedule. This will ensure consistent and optimal lighting for your plants, promoting healthy growth and development. Regularly monitor the plants' response to the light and adjust the schedule if needed. Remember to provide periods of darkness as well, as plants need time to rest and undergo natural processes.
Here is a step-by-step guide on how to effectively manage the light schedule:
- Determine the light requirements: Different plants have varying light requirements. Research and understand the specific needs of the plants you are growing, including the optimal number of hours they need to be exposed to light each day.
- Choose the right grow lights: There are various types of grow lights available, such as fluorescent, LED, or high-intensity discharge (HID) lights. Select the appropriate light source based on the needs of your plants and the size of your growing area.
- Set up the grow lights: Install your grow lights in a proper hanging system, ensuring they are securely and evenly hung above the plants. Make sure the lights are at the appropriate distance from the plant canopy to avoid any burning or stretching.
- Determine the light intensity: Adjust the light intensity based on the growth stage of your plants. Young seedlings may require lower light intensity, while mature plants may need higher intensity. Refer to the manufacturer's guidelines for specific light intensity recommendations.
- Establish the light schedule: Create a consistent and appropriate light schedule for your plants. This typically involves setting a specific number of hours of light exposure per day, as well as the timing of the light cycle (e.g., 18 hours on and 6 hours off for vegetative growth, 12 hours on and 12 hours off for flowering).
- Use a timer: It is highly recommended to use a timer to automate the light schedule. This ensures that your plants receive consistent light exposure without the need for manual intervention. Set the timer to turn the lights on and off at the desired times.
- Monitor and adjust: Regularly monitor your plants' response to the light schedule. Observe their growth, leaf color, and overall health. If you notice any signs of stress or inadequate growth, consider adjusting the light schedule by either increasing or decreasing the light exposure time.
- Maintain consistency: Consistency is key when managing the light schedule. Avoid sudden or drastic changes in the light cycle, as it can negatively impact plant growth and development. Stick to the established schedule unless necessary adjustments are required.
download here: https://x-abcd.com/files/themes/7315/assets/X Tips-Hang Grow Lights.pdf

